• Home
  • Motherhood
  • Shop Shares
  • Style
  • Recipes/Crafts/Home

Happily Ever Mock

October 4, 2017

Pumpkin Bread Recipe

October 4, 2017

I made my first Pumpkin recipe of the season tonight, and it is going to knock your socks off!
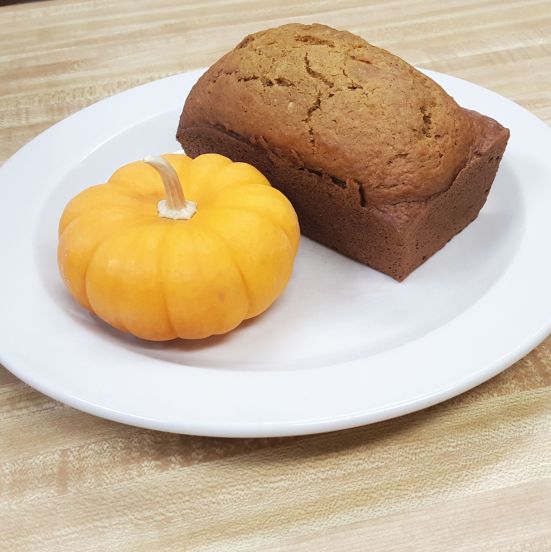
Pumpkin Bread

Ingredients

  • 1 1/2 Cups Flour
  • 1 Cup Sugar
  • 3/4 teaspoon Salt
  • 1 teaspoon baking soda
  • 1/2 teaspoon nutmeg
  • 1/4 teaspoon cardamom
  • 1/2 teaspoon cinnamon
  • 1/4 teaspoon allspice
  • 1/4 teaspoon cloves
  • 2 eggs
  • 1 Cup Pumpkin Puree
  • 1/2 Cup canola oil/vegetable oil
  • 1/2 teaspoon vanilla

Preheat oven to 350 degrees. Mix dry ingredients first then add in wet ingredients. Spread into a loaf pan or 2 mini loaf pans. For normal size loaf pan bake for 50 minutes or until toothpick comes out clean.  For mini loaf pans cook for 35 minutes or until toothpick comes out clean. Let cool completely before removing from pan.  

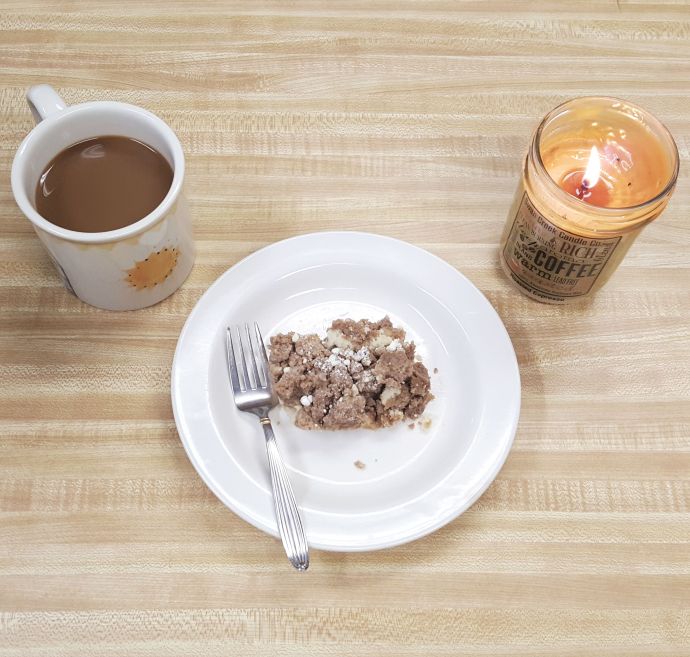
While in the oven I mixed up this delicious cinnamon sugar cream cheese. I blended 1 8 oz block  of cream cheese with 3 TBS of brown sugar and 1 teaspoon of cinnamon.  

What are your favorite Fall recipes?

September 18, 2017

Currently- September 2017

September 18, 2017

Hi Friends and Happy Monday! I sure hope everyone had a fantastic weekend.  We spent our weekend with family and even attended the Fall Festival at our Church.

Besides that, I thought I would give you a little sneak peek at what else we have been up to:

Reading:

Hallie and I just finished up Charlotte’s Web and are on to Stuart Little.  She is also LOVING Say Zoop, an interactive book by the same author as Press Here. 

As for me, I haven’t picked anything up since the middle of the Summer.  I read The Woman in Cabin 10 and it was fantastic! Looking into books to grab at our next Library visit! Any recommendations?

Watching:

I am SO pumped for Fall TV.  Dancing with the Stars starts tonight and I couldn’t be more excited! We will also be watching How to Get Away With Murder and binge watching Jane the Virgin on Netflix! Who else watches it? We are on Season 2!

Drinking:

This Pumpkin Praline Coffee from Community Coffee. I am all about the Pumpkin Spice!

Eating:

This time of year we always have something baking, and right now I am DIGGING these Chocolate Chip Cream Cheese Cookies.  They are so moist and delicious!

  • Ingredients
    •   1/2 cup of unsalted butter (room temp)
    • 1 8 oz. block of cream cheese
    • 1 cup sugar
    • 1/2 cup brown sugar
    • 1 teaspoon vanilla
    • 3/4 ts salt
    • 1 ts baking soda
    • 2 cups flour
    • 1 12 oz bag chocolate chips
  • Steps
    • Mix butter, cream cheese, sugar and brown sugar
    • Add in all other ingredients one at a time mixing well after each addition
    • Roll into 1 inch balls and pat flat.
    • Place on a cookie sheet lined with parchment paper
    • Bake at 350 for 12-15 minutes or until browned
  • Notes
    • Mine took about 14 minutes
    • They will start to brown but look fairly gooey still. No worries, they will set as they cool

Praying For:

If you don’t already know, Christopher and I are opening our own T-shirt shop.  Things have been moving fairly slowly.  My prayers are that we find the right people to help us build out our shop so that we can open very soon!

Working on:

Constantly working on growing our blog and instagram. We love connecting with all of you! If you like what you read/see please feel free to share! 🙂

Looking Forward to:

All things Fall! Pumpkin Patch, trick or treating, fall recipes and spending time with family and friends! Oh and cool weather! We so need it to cool off here in Dallas!

Loving for Mommy:

I know I shared these already, but on the off chance you missed it, these Old Navy Crop Pants are life!

Wishlist for Mommy:

This Gap Pullover sweater.

Loving for Hallie:

These Unicorn Pajamas from Carters.  Hallie just loves them and she looks too cute in them!

Wishlist for Hallie: 

This precious Old Navy Polka-dot Dress

What have you guys been up to? What are you loving? Have a great week!

September 11, 2017

Mushroom Garlic Chicken

September 11, 2017

There’s nothing better than a one skillet meal.  Especially when it tastes like this one!

Ingredients:

  • 8 pieces of chicken (I used a mixture of breasts and thighs
  • Salt and Pepper
  • 2 Cups of Chicken Broth
  • 2 TBS minced garlic
  • 1 ts red pepper flakes
  • 1 ts fresh or dried Rosemary
  •  olive oil
  • 16 ounces of mushrooms, sliced
  • 2/3 cup of diced green onions
  • 4 TBS butter
  • 1/2 cup heavy cream
  • about 3 TBS fresh chopped parsley to top
  • (optional…but trust me you will want it for the sauce) A baguette for dipping

1.  Slice or pound chicken to about 1 inch thickness and sprinkle with salt and pepper on both sides, set aside

2. In a small bowl combine chicken broth, garlic, red pepper, green onions and rosemary.  Mix well and set aside.

3. Heat oven to 375 degrees

4. In a large deep (oven safe) skillet heat about 3 TBS olive oil.  Cook mushrooms over medium-high heat. Cook until well browned then remove to a large dish. Keep warm.

5. Add another 2 TBS of olive oil to skillet and brown on both sides for 3 minutes.  (I did this 4 pieces at a time as to not crowd the skillet) Remove to large dish with mushrooms and keep warm. (You will continue cooking chicken in the oven)

6. Reduce skillet heat to medium and add the chicken broth mixture.  Stir vigorously while scraping the bottom of the pan for any stuck browned pieces.  Cook for about 5 minutes.

7. Remove skillet from heat and add in the butter and the cream.

8. Add the chicken and mushrooms back in and mix.

9. Cook in the oven for 10-15 minutes or until chicken is no longer pink.

10. Top with parsley and serve.

I hope you enjoy this dish as much as we did! I was soaking my baguette in the sauce it was so good!


September 8, 2017

Friday Happenings- There’s a chance there’s tomato sauce in my hair

September 8, 2017

Happy Friday all! I am thanking God for Friday more than usual today, as this week has been crazy!

Just to give you a taste, I had my hair freshly colored yesterday. I came home to no nap, full toddler meltdown mode while I was trying to make dinner. I was making my favorite Hearty Bolognese sauce and putting out toddler fires left and right.  I went to open a can of crushed tomatoes and our can opener missed several sections along the edges.  So there I was going over and over the same spots to no avail. Toddler screaming as my blood starts to boil with hatred toward the can opener… So finally I tried to puncture it myself, splashing tomato sauce everywhere…including my brand new hairdo!  Awesome. As you might know, one way to keep your color looking intact after a dye job is to go a few days before washing it again. I rinsed the tomato sauce off with water, but there’s a chance it’s still in my hair.  In other news, we need a new can opener.

Since my mishap yesterday, I have been binge eating this delicious coffee cake. You definitely need to try it! It’s the perfect Fall treat to pair with coffee.

Cinnamon Coffee Cake

Ingredients:

For the Cake:

  • 1 1/2 Cups Flour
  • 1/2 Cup sugar
  • 2 1/2 teaspoons baking powder
  • 1/2 teaspoon of salt
  • 1 egg
  • 1/2 cup milk
  • 2 Tablespoons vegetable oil
  • 1 1/2 teaspoons vanilla
  • 1/2 teaspoon of almond extract

Preheat oven to 325 degrees.  Grease and Flour 9×13 baking dish. Mix dry ingredients first and add in wet ingredients.  Spread into pan.  It will seem thin, but don’t worry, it puffs up.

For the Topping:

Ingredients:

  • 2 1/2 cups flour
  • 1 cup brown sugar
  • 1 1/2 teaspoons cinnamon
  • 1 cup melted butter (cooled)
  • confectioners sugar for dusting

Mix dry ingredients then add in butter.  Crumble over cake mixture.

Bake for 20 minutes turning pan halfway through. Cool and dust with confectioners sugar.

So if you need me this weekend, I will be bingeing on this coffee cake and shopping the June and January Fall drop! We are in it for all the twirl skirts and cardigans!! To get 15% off your first order follow this link! The drop starts at 9pm EST so set your alarms! Things go quickly!

Have a happy weekend folks!

June 17, 2017

The Nursery that Stole my heart

June 17, 2017

I can remember when I was pregnant with Hallie, before we knew that she was a girl, searching baby bedding and nursery ideas on Pinterest and secretly hoping she was a girl so that I could buy this Land of Nod bedding and paint this sweet Cherry Blossom Tree on her wall.
When I did find out she was a girl I couldn’t wait to make my dream a reality.  My Mom, Mother in Law and I spent hours in her room painting the walls that perfect shade of pink and perfecting all those sweet flower petals, birds and butterflies.
Little did I know then how much that room would mean to me. That was the room we brought our baby girl home to.  So many of Hallie’s baby memories were made in that room including the first time she pulled up to standing.  After my Mom passed, Hallie would obsess over who painted her tree. She would say, “Who painted my tree? Nana. Who painted my Birds and Butterflies? Memi. Who painted my flowers? Momma.”  Over and over.
It’s been a year since we moved from our house, and this is the room I miss the most. Before we moved out of the house, my sweet friend came and took these precious photos of Hallie and her room that I think we will both cherish forever.
 Similar Crib Bedding Similar Kid Bedding
  Hallie’s Tia Joyce and I modpodged these letters. The girls I used to Nanny for did the Fingerpaintings.

 Hallie’s Godmother helped me make the mobile.
She also made her puppy quilt.
 My mother made the cross stitchings of those bears
 The madame alexander dolls were mine as a child. The small trinket box was my Mother in Laws


 This is where she first pulled up to standing
 My parents gave her the cradle and doll for her 2nd Christmas


Hallie’s initials along with mine and her grandmothers


 When we decided to sell our house, before my mother passed, we had her paint the tree onto a dollhouse to give Hallie for Christmas.  It definitely makes not being able to recreate Hallie’s sweet Nursery right away a little easier.


February 10, 2017

Donut Valentines and Heart Shaped Pizza

February 10, 2017

I love any chance to celebrate around here, but having a Toddler that gets so excited about anything out of the norm makes holidays even more fun!

Last Night Hallie and I made Heart Shaped Pizza for National Pizza day! She loved it and it was soooo easy! That’s a win/win in my book!

Plate/Cup/Napkin from Crate and Barrel 

To form Pepperoni hearts, I just used kitchen shears to change the circles into hearts! It was delicious!

Today Hallie and I brought a special Valentine to our Play Group Valentine Party! Each of her friends got a milk bottle with their choice of white or strawberry milk, a cute little straw and some donuts! The tag I created read: “Donut you know you’re my favorite valentine?”

Feel free to print your own Donut tag!

Donut Tag Printable 
This weekend Hallie, Daddy and I are exchanging Valentines since Daddy will be out of town next week! Hallie and I of course have a lot more Valentine fun in store though, so stay tuned!
Happy Weekend!
<3 Kelly and Hallie

February 1, 2017

Valentine Crafts for Little Hands

February 1, 2017

One of our favorite things to do to celebrate Valentines Day is making our very own Homemade Valentines! You might think it would be hard to get little hands (and toes) involved in creating beautiful artwork that their friends and loved ones will treasure, but it’s actually rather easy! Here are 6 fun crafts Hallie and I have tried in the Valentines Days over her (almost) 3 years!

1.) Make your own Heart Shaped Crayons-
Hallie and I did this as her Valentine gift for her friends last year and she LOVED it! She really enjoyed helping me sort the crayons by color and breaking them up to put in the mold! It was really good for identifying colors and fine motor skills!

What you’ll need-

  • A heart shaped mold (we got ours at hobby lobby)
  • Old broken crayons (We also mixed in a pack of dollar store crayons)
What to do-
Peel off the crayon paper. Break them up and fill each tray until it is a little more than half way full.  Melt them at 350 for 10 minutes (or until melted).  Wait about an hour or so until cool, then pop them out! You can sort them by color to create crayons of each color of the rainbow like we did or have fun making multicolored crayons!
2.)  Finger paint Valentines Hearts-
What you’ll need-
  • Kid safe paint
  • Paper
  • Scissors
  • Marker/pen
(OMG look how tiny she is!)
I just dropped a couple drops of paint in “Valentine Colors” on the paper and let Hallie go to town! She loved it! It was GREAT for creativity! We are planning on doing this again this year! Once the paper dries cut out some hearts and write a message to friends and family from your sweet little
3.) Toilet Paper Roll Heart Stamping-
What you’ll need-
  • Toilet Paper Roll
  • Tape
  • Paint
  • Paper
Tape the toilet paper roll into a heart shaped stamp.  Give them some paint and let them use the toilet paper roll as a stamp to stamp hearts on the paper! This one is definitely getting a redo this year! Last year Hallie just wanted to do more finger painting! Lol I say it’s best for a Toddler 2 and up! But it is great for fine motor skills!
4.) Heart shaped mosaic-
What you’ll need-
  • Paper of different colors
  •  Cardboard or Card stock cut into a heart
  •  Glue
Depending on the age of the child, you can either tear the paper for the child or let them help you (its great for fine motor skills as well!)  then let them glue the paper on the Card stock/Cardboard. Hallie is REALLY into gluing this year!
5.) Footprint Heart Plates
What you’ll Need-
  • Inexpensive plate (Dollar store or Target)
  • Ceramic Paint
  • Paintbrush
  • Oven
We did these as a keepsake for Hallie’s first Valentines Day.  We even made a few so she could give them as gifts to her grandparents! It was so sweet! I put her in her highchair to make it easier.  I painted the first foot and stamped it on the plate. Then cleaned her foot and repeated with the second foot.  Then I placed it in the oven at 300 degrees for 30 minutes.  I am so glad I did this!
6.) Button Heart-
What you’ll need-
  • Cardboard or card stock cut into a heart
  • Glue (After doing this I think a bottle of wet glue would have worked better)
  • Buttons
This one is simple! Just glue the buttons onto the heart! Hallie had so much fun creating patterns and choosing which buttons would fit best where! (Good for problem solving skills, patterns, and fine motor) Hallie chose to give Daddy this special Valentine!


What crafts are you working on for Valentines Day?


December 9, 2016

Holiday Treats

December 9, 2016

Hello Friends,
I know it’s been a while. I went from working pretty heavily on Socklings to distancing myself from the brand for personal reasons,  Now I’m back here and ready to blog!

For my first post back, I thought I would share the delicious treats Hallie and I have been baking!
This time of year is so fun now that Hallie is old enough to really help and get excited about all the Christmasy To-dos!

We of course have had so many requests for the special Linzer cookies, that I have been making batch after batch of them.  You can find the recipe here! They really make the perfect Holiday treat!

If jam isn’t your jam, Hallie and I also created these DELECTABLE Brownie Bites, that were really a hit!

INGREDIENTS:
1 package of boxed brownies (prepared according to package)
2 1/2  bags of milk chocolate chips
Sprinkles

DIRECTIONS:
Prepare brownies according to directions on box and let slightly cool.
While still warm crumble brownies into a bowl.
melt 1 bag of chocolate chips in a large measuring cup/ bowl slowly. (I do 30 seconds at a time stirring after each time until completely melted)
Once melted completely, stir into brownie mix and refrigerate for 30 minutes,
Once cold, form balls of dough into bite size pieces. Refrigerate again while preparing chocolate dip.
Melt the remaining chocolate chips using the same method as before.
Once completely melted, dip the brownie bites into the melted chocolate dip until completely covered.  Tap side of the bowl after each dip to remove excess chocolate.  Drop onto plate.  Repeat until all covered in chocolate and top with sprinkles.

These were so easy and so delicious!

What are your favorite holiday treats?

<3 Kelly and Hallie

October 21, 2016

2nd Annual Glow Stick Bath

October 21, 2016

Hey all! I know it’s been forever! Well I am back with a lot of great photos from our 2nd Annual Glow Stick bath! Bubbles + Glow Sticks + a toddler = an hour of Splish Splashy fun!

Such a blast! We’ll be doing it again soon! Thanks SweetTurtleSoup again for the great idea!
<3 Kelly and Hallie

August 9, 2016

Menu Board

August 9, 2016

Good afternoon friends.  I know I have been a little MIA.  Things around the Mock house are really busy now that I am essentially working 2 jobs and taking care of my crazy 2 year old bean! Anyway, today I wanted to share the going away gift I made for my cousin Karley.  She is moving to Montana and it will be the first time she is going to be living far away from home.  I thought I would make her something functional that she would us every day.  That way, when she uses it she could think of home and of course, ME! Ha!

I decided on a Menu Board because she had admired mine, and we were going to make one together before the move but ran out of time.  Here’s how it turned out:

I just got a bunch of scrapbook paper and glued it down to a magnet board. I made a pocket with stickers and more scrapbook paper and glued magnet to bottle caps and decorated them with stickers! Karley liked it a lot and I think it turned out super cute! 
<3 Kelly 

  • « Previous Page
  • 1
  • 2
  • 3
  • 4
  • 5
  • Next Page »

About Me

Hi there! I am Kelly! Wife to Christopher and Momma to spunky daughter Hallie (June 2014) and Toddler Girl girl Elise (2019) Our mini aussie Stella was my first baby! I am a contributing writer and giveaway coordinator for Dallas Moms. I love holidays and any reason to celebrate! You can often find me baking cookies in the kitchen or working on crafts or DIY projects with a little help from Pinterest. My busy life has me living on coffee and carbs, and in the rare incident she I am alone you can probably find me belting out Journey songs in my car!

Get Social

Blog Archives

  • February 2021
  • October 2020
  • September 2020
  • July 2020
  • June 2020
  • May 2020
  • March 2020
  • January 2020
  • December 2019
  • November 2019
  • October 2019
  • September 2019
  • August 2019
  • July 2019
  • June 2019
  • May 2019
  • April 2019
  • March 2019
  • February 2019
  • January 2019
  • December 2018
  • November 2018
  • October 2018
  • September 2018
  • August 2018
  • July 2018
  • June 2018
  • May 2018
  • April 2018
  • March 2018
  • February 2018
  • January 2018
  • December 2017
  • November 2017
  • October 2017
  • September 2017
  • August 2017
  • July 2017
  • June 2017
  • May 2017
  • March 2017
  • February 2017
  • January 2017
  • December 2016
  • November 2016
  • October 2016
  • September 2016
  • August 2016
  • July 2016
  • June 2016
  • May 2016
  • April 2016
  • March 2016
  • February 2016
  • January 2016
  • December 2015
  • November 2015
  • October 2015
  • September 2015
  • August 2015
  • July 2015
  • June 2015
  • May 2015
  • April 2015
  • March 2015
  • February 2015
  • January 2015
  • December 2014
  • November 2014
  • October 2014
  • September 2014
  • August 2014
  • July 2014
  • June 2014
  • May 2014
  • April 2014
  • March 2014
  • February 2014
  • January 2014
  • December 2013
  • October 2013
  • July 2013
  • June 2013
  • May 2013
  • April 2013
© 2017. happilyevermock.com